Tiers and prices
Set up what readers pay for: a free tier and one or more paid tiers, each with a monthly and a yearly price.
Who can do this: The site owner or an administrator. Paid tiers need Stripe connected, on the Publisher or Business plan.
A tier is a level of membership. Every site has a Free tier for readers who sign up without paying. Paid tiers each have a name, a monthly and a yearly price, a description and a list of benefits. Readers choose one in your site’s sign-up pop-up, and you decide which posts each tier can read.
How many paid tiers you can have
| Plan | Paid tiers |
|---|---|
| Starter | None. Stripe can’t be connected, so there’s only the Free tier. |
| Publisher | Your first paid tier, plus up to 3 more. |
| Business | Your first paid tier, plus up to 10 more. |
Archived tiers don’t count. If you reach the limit, Save on a new tier tells you it would exceed the tiers limit on your plan. See plans and what each includes.
Where tiers live
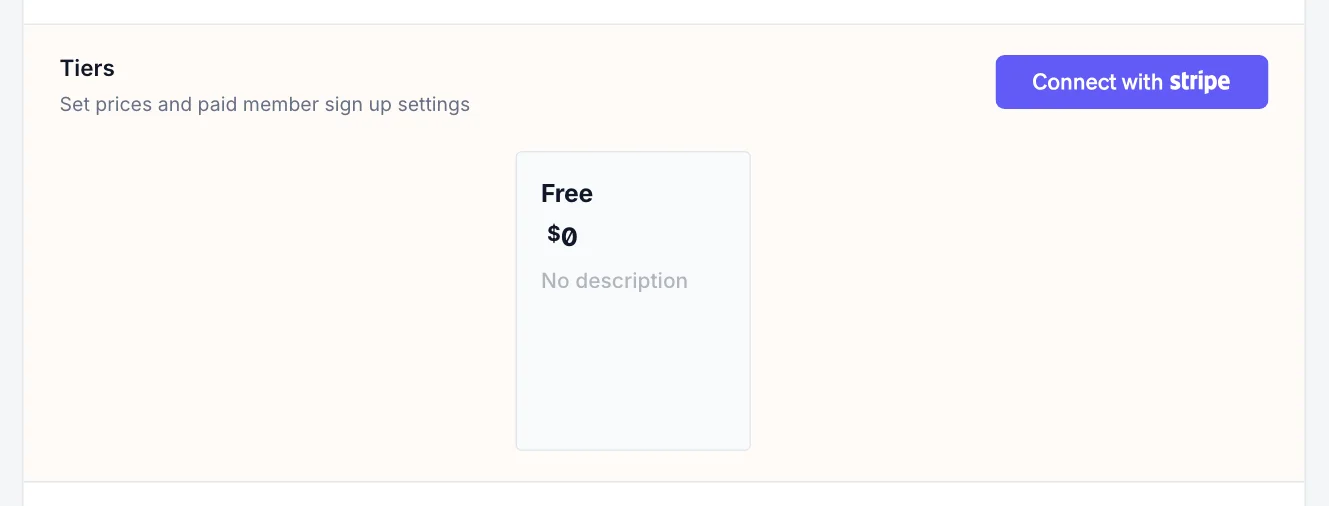
Open Settings → Membership → Tiers. Until Stripe is connected you’ll only see the Free tier and a Connect with Stripe button. Connect Stripe first; your paid tiers then appear here with Active and Archived tabs, sorted by monthly price.
Edit the free tier
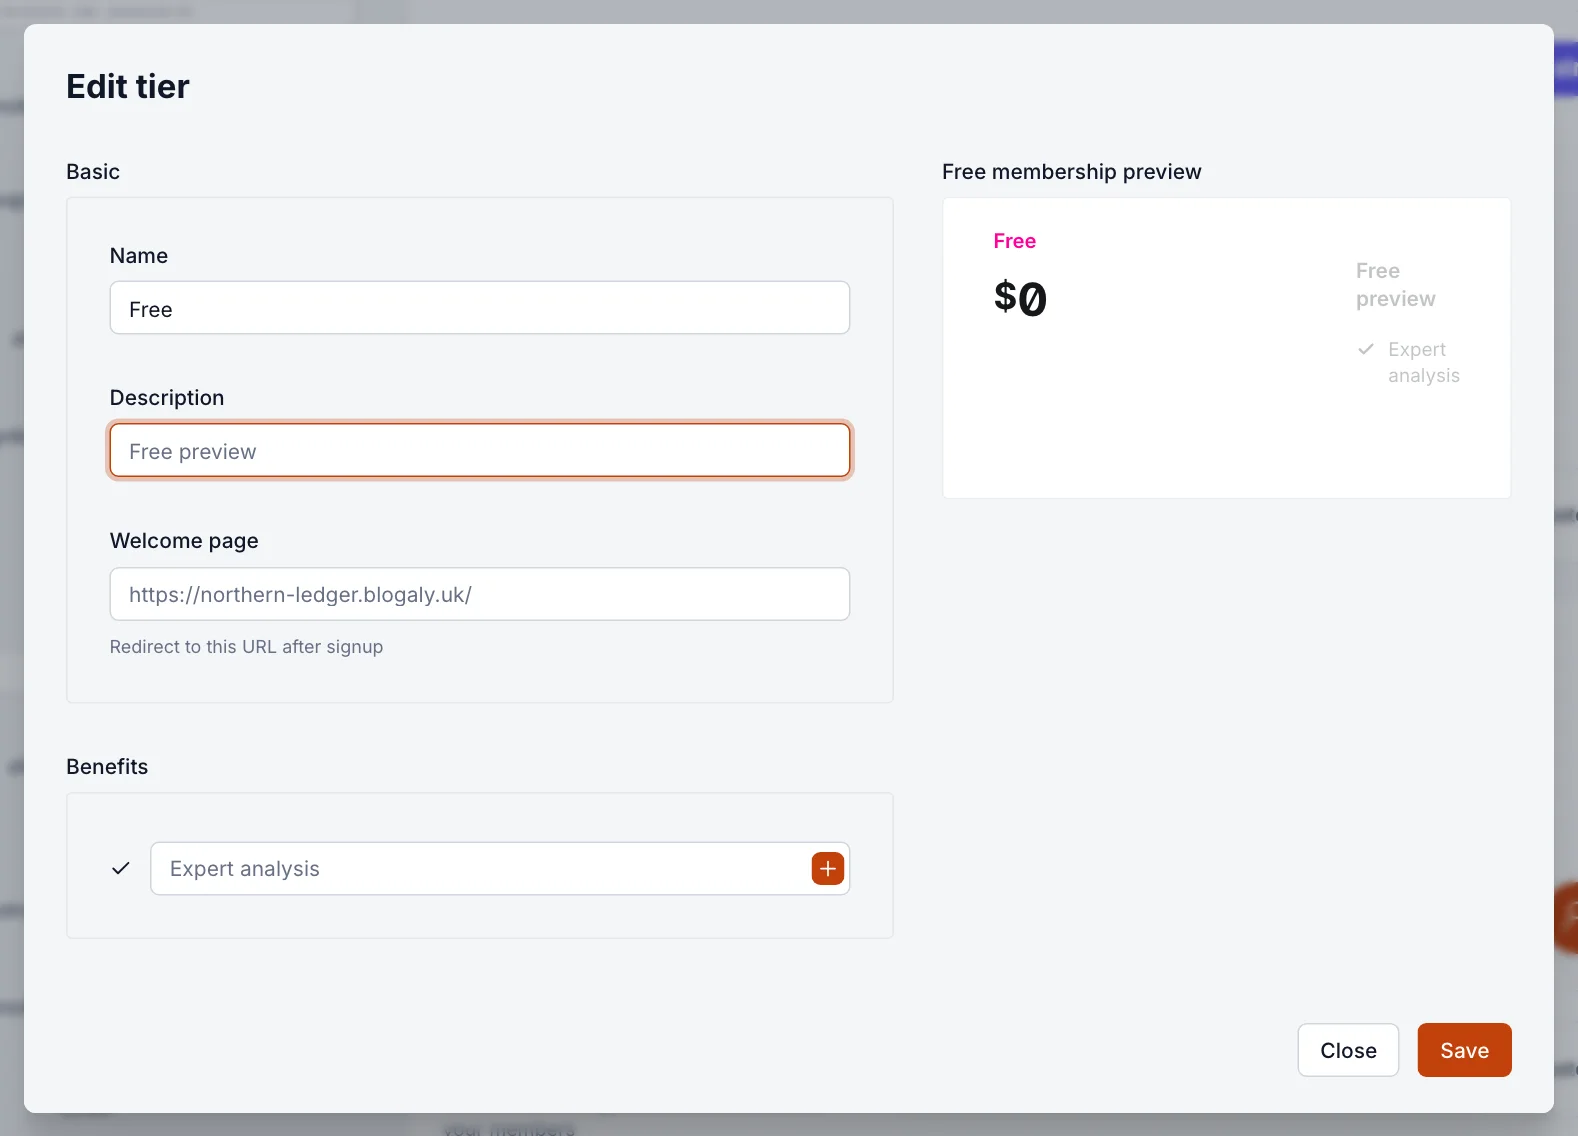
Select the Free card to give it a description, a welcome page and a list of benefits. These show in the sign-up pop-up next to your paid tiers, so a short line on what free members get (“Friday headlines by email”) helps readers choose.
Rename your first paid tier
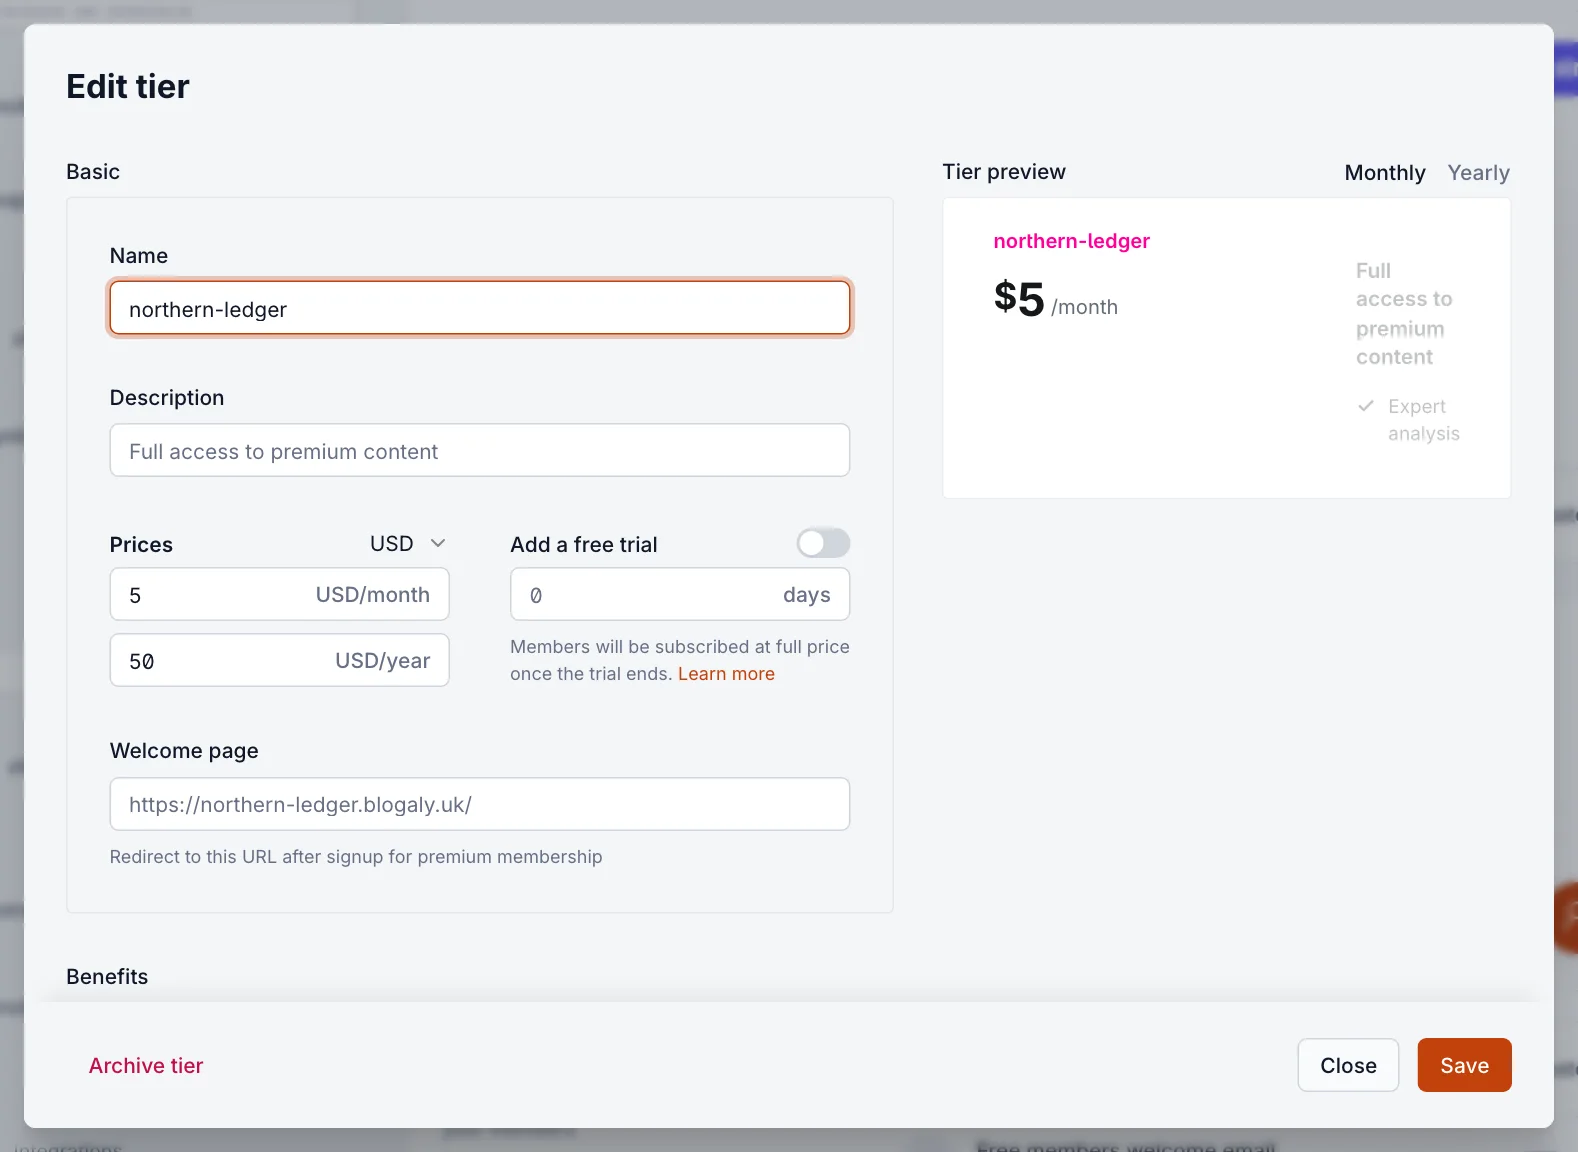
Your site starts with one paid tier, named after your site’s address (for example northern-ledger), at $5 a month and $50 a year. Readers see that name, so open it from the Active tab and give it a real name and description before you launch.
Add a paid tier
- In Tiers, on the Active tab, select the + card (Add tier).
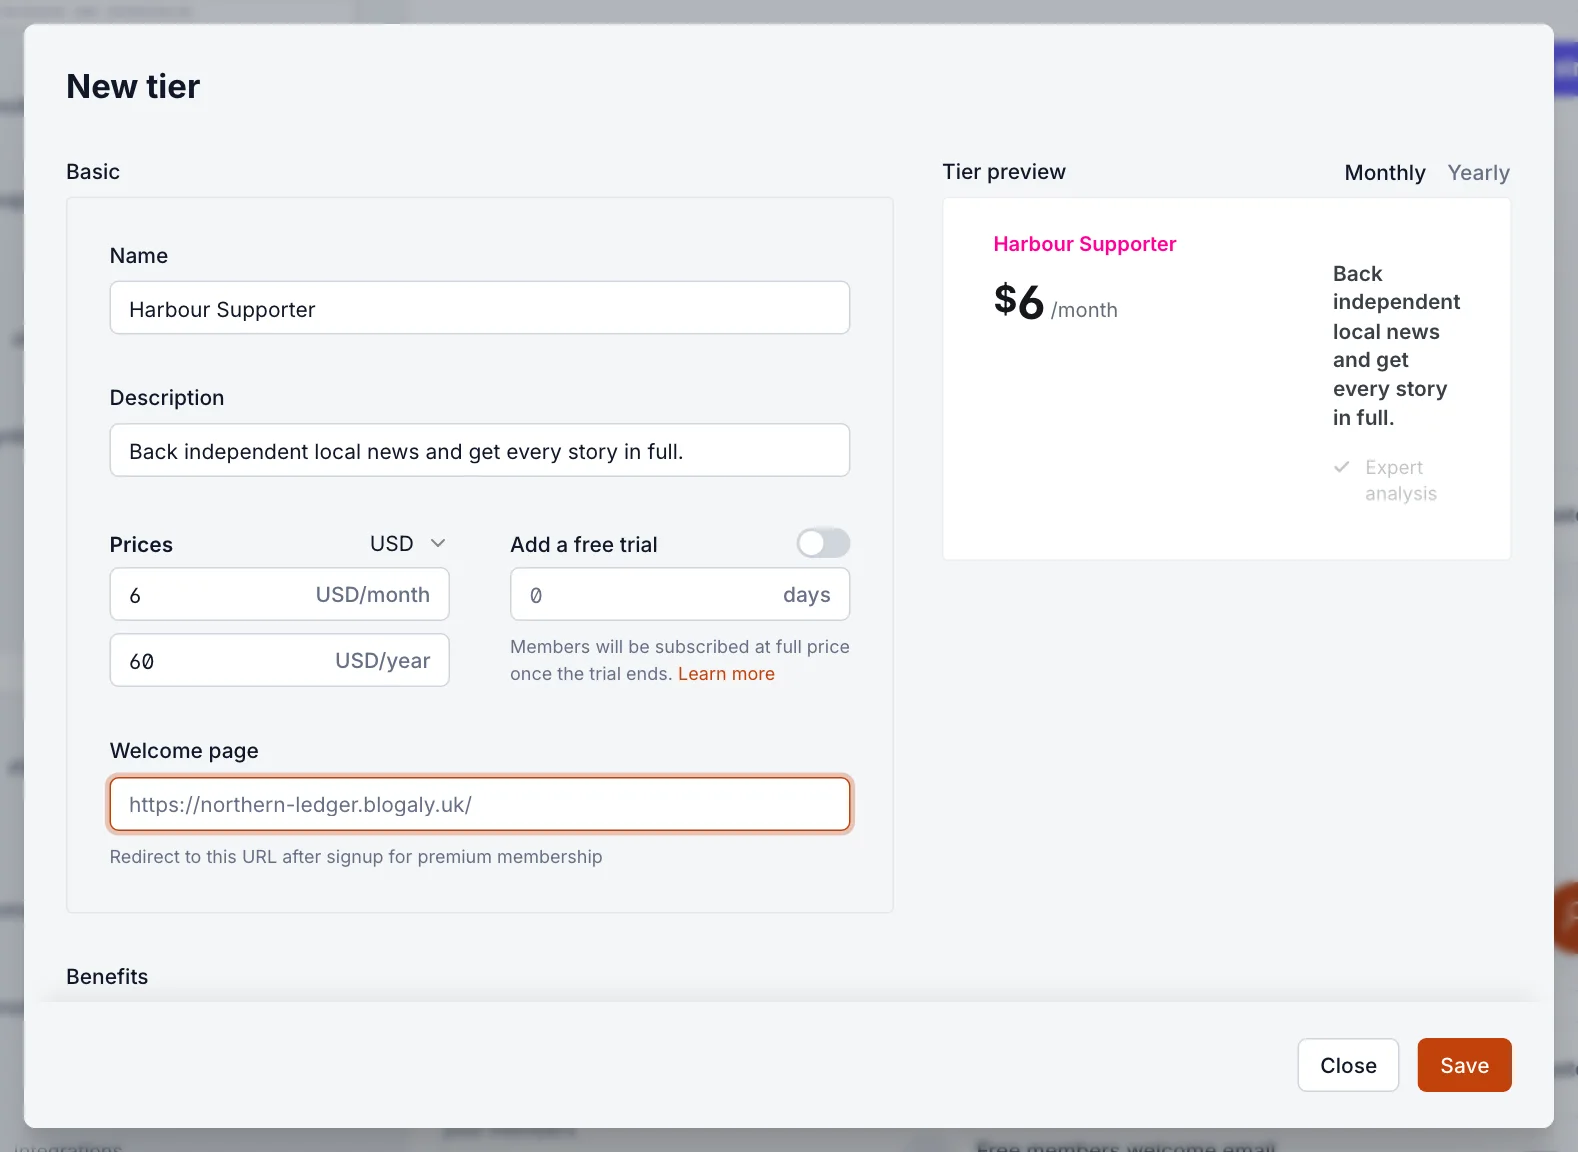
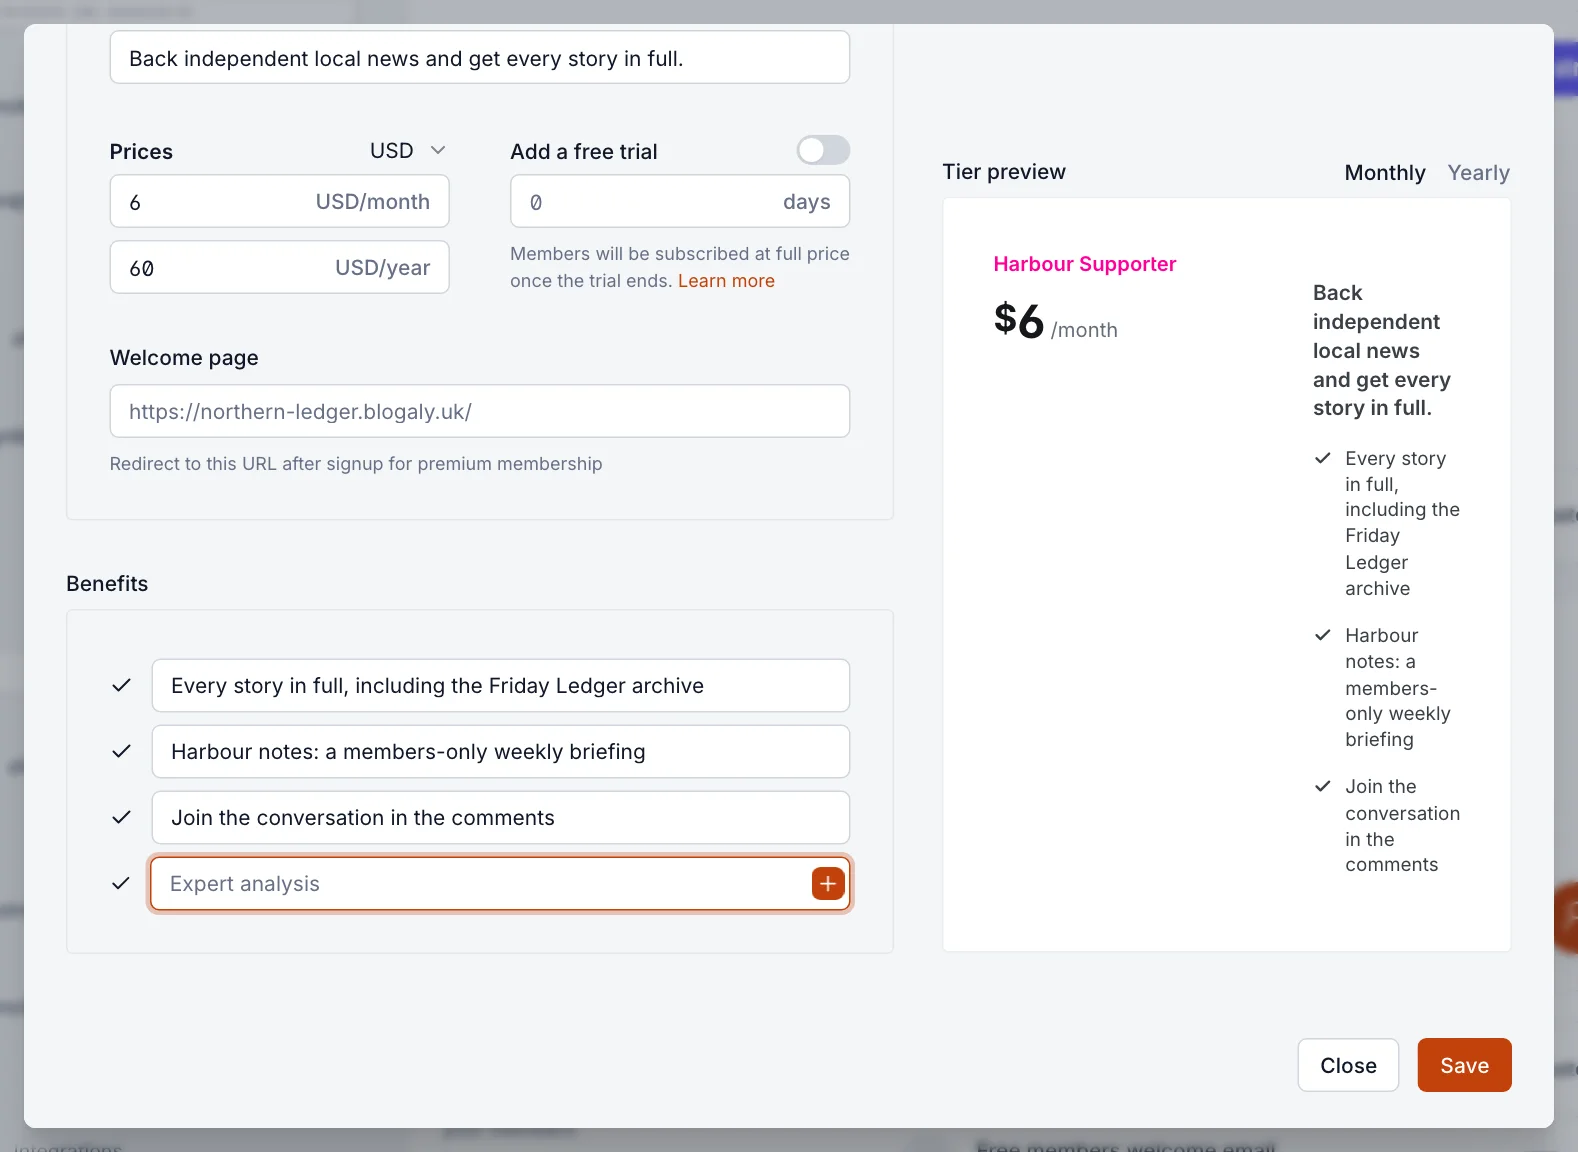
- Enter a Name and a short Description. Both appear in the sign-up pop-up.
- Under Prices, pick the currency, then enter a monthly and a yearly price. Both are required and must be more than zero. A yearly price under 12 times the monthly one shows readers a saving.
- If you like, turn on Add a free trial and enter the number of days. See free trials.
- Set a Welcome page: a page on your site readers land on after paying, such as a thank-you page. Leave it empty to use the standard confirmation.
- Add Benefits, one per line. Press Enter or select + after each. Drag to reorder.
- Check the Tier preview on the right, switching between Monthly and Yearly, then select Save.
Choose what the sign-up pop-up offers
Saving a tier doesn’t decide where it’s shown. Open Settings → Membership → Signup portal → Customize. On Signup options, once Stripe is connected:
- Available tiers: tick the tiers readers can choose. Untick Free to offer paid tiers only.
- Available prices: show Monthly, Yearly or both.
- Default price at signup: which of the two is selected first, when both are on.
Select Save. A tier you leave unticked still works for the members already on it; it just isn’t on the menu. See the signup and account pop-up for everything else in that window.
Change a price
Open the tier, change the price and select Save. The new price applies to new subscribers only. Everyone already subscribed keeps paying what they signed up at. To move existing members to a new price, you’d need to change their subscriptions in Stripe.
Archive a tier
You can’t delete a paid tier, but you can archive it. Open it and select Archive tier, then Archive.
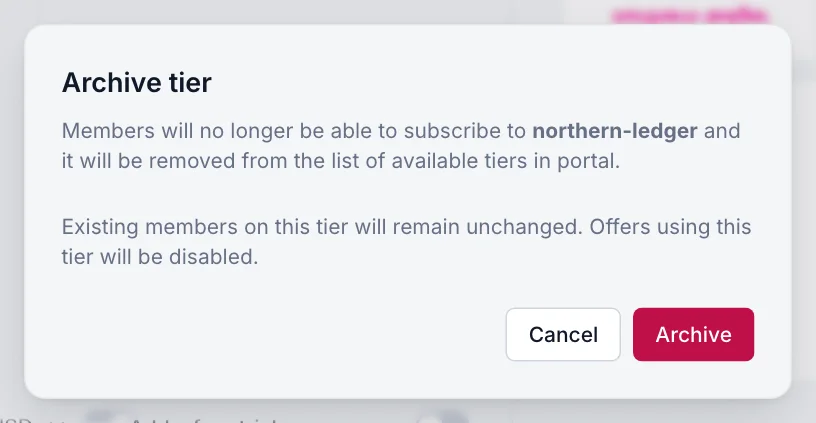
- New readers can’t choose it, and it disappears from the sign-up pop-up.
- Existing members keep it and keep paying for it.
- Offers for that tier stop working.
- Find it on the Archived tab. Open it and select Reactivate tier to bring it back.
Common mistakes
- Launching with the starting tier still named after your address. Rename it.
- Expecting a price change to reach current subscribers. It doesn’t.
- Adding a tier but not ticking it under Available tiers, so readers never see it.
- Forgetting to choose who can read each post. Tiers only matter once posts are limited to paid members or to specific tiers. See who can read a post.
Good to know
- Each tier has one currency for both its prices.
- The Free tier can’t be archived. To stop free sign-ups, untick it under Available tiers.
- You can give a member a paid tier without charging them (a complimentary subscription) from their profile in Members.
Last checked against the product on 7 November 2026.
Related
Still stuck?
Tell us what you were trying to do and what you saw, and we’ll help you sort it out.
Contact us