Connect Stripe to take payments
Link your own Stripe account to your site so readers can pay for a subscription. Blogaly takes no cut of what you earn.
Who can do this: The site owner or an administrator, on the Publisher or Business plan. The Starter plan can’t take payments.
Paid subscriptions, offers, gift subscriptions and tips all run through Stripe, the payments company. You connect your own Stripe account, so readers pay you directly and the money lands in your bank account on Stripe’s payout schedule.
- Blogaly takes 0%. There is no platform fee on any payment, on any plan.
- Stripe’s own fees still apply. Stripe takes its processing fee from each payment before paying you out. Check Stripe’s pricing page for the rates in your country.
- Your readers, your customers. Subscriptions, invoices and receipts live in your Stripe account. If you ever leave Blogaly, they stay with you.
Before you start
- A Stripe account. If you don’t have one, create it at stripe.com first. It’s free to open.
- To take real payments, Stripe will ask you to activate the account: your business details, ID and a bank account for payouts. You can connect before that and use test mode while Stripe checks your details.
- Use the same browser for the whole process. The key you paste at the end only works in the admin session that asked for it.
1. Open the Stripe settings
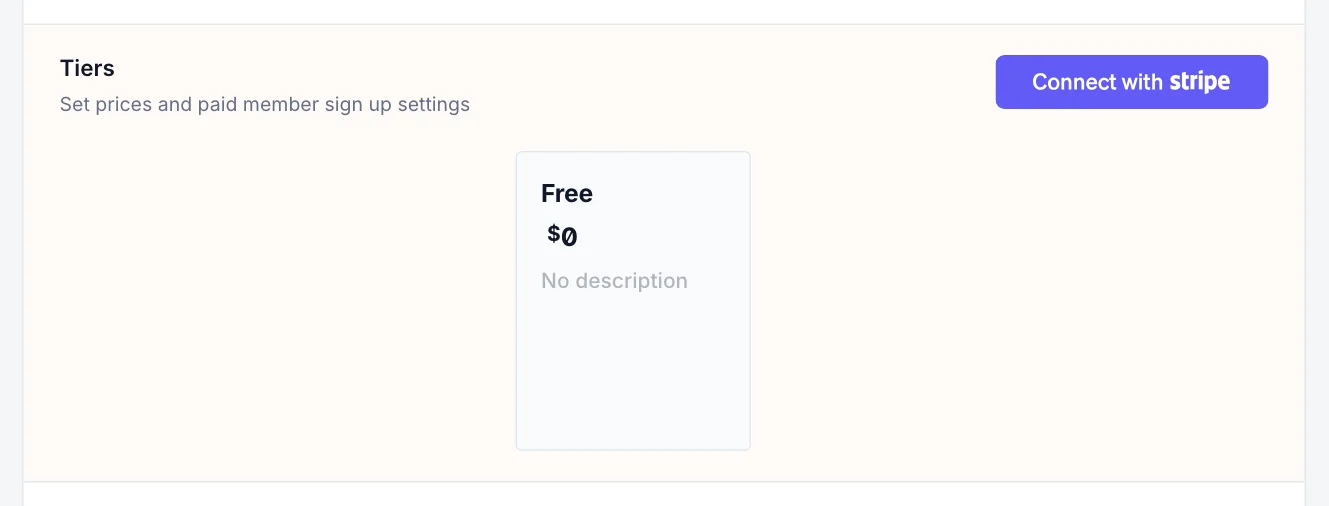
- In your site’s admin, open Settings and go to Membership → Tiers.
- Select Connect with Stripe.
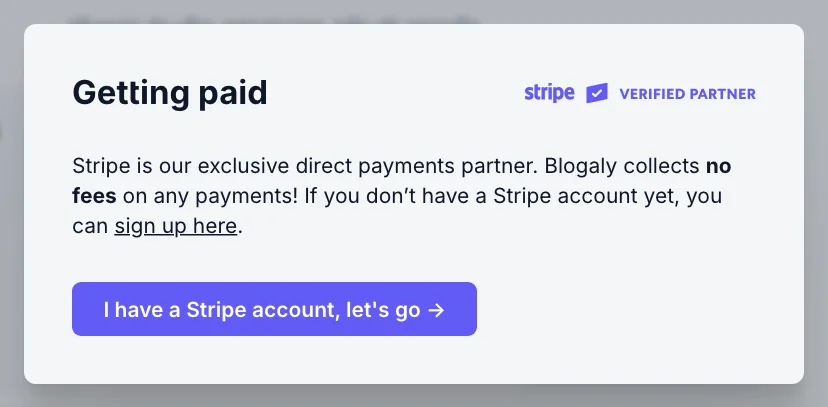
A Getting paid window opens. It links to Stripe’s sign-up page if you still need an account. When you have one, select I have a Stripe account, let’s go →.
2. Choose live or test mode
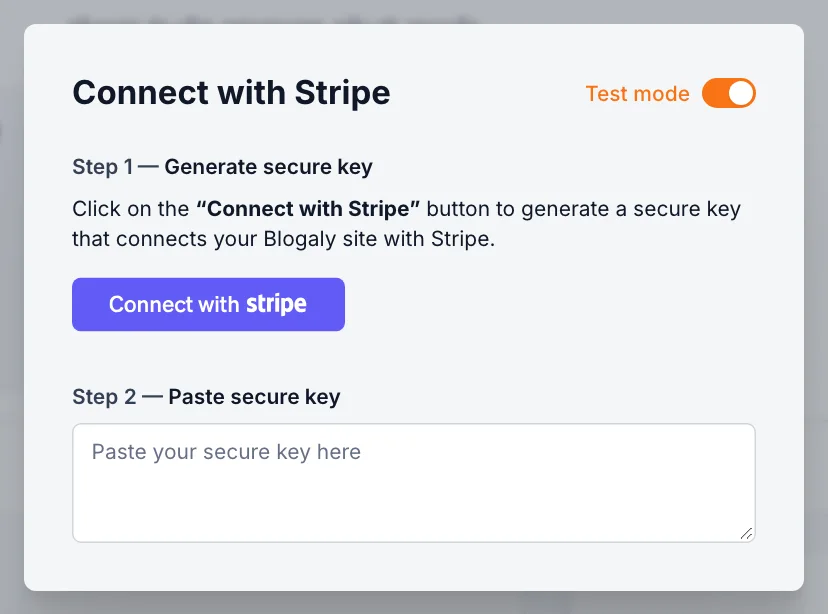
The next window has two steps and a Test mode switch in the corner.
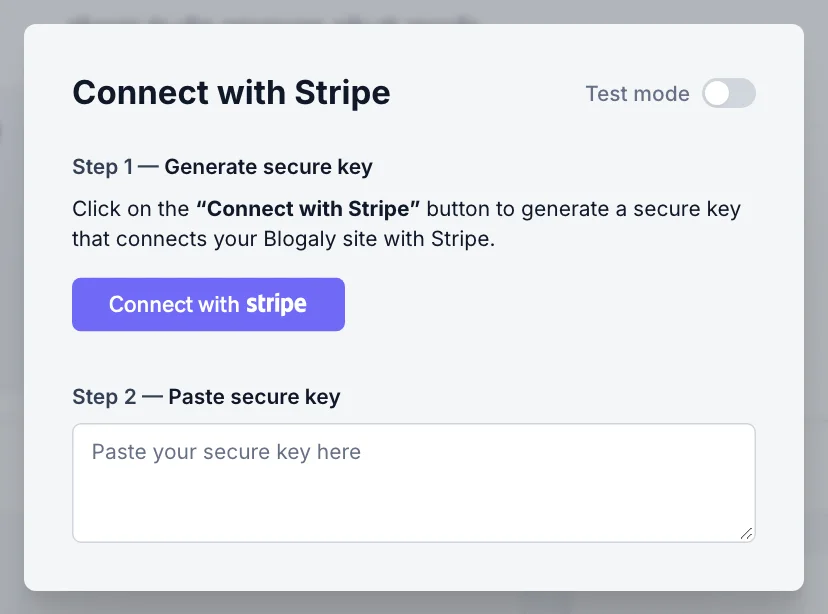
- Leave Test mode off to take real payments.
- Turn Test mode on to try the whole flow first with Stripe’s test cards. No real money moves. Good for a rehearsal before you launch.
3. Approve the connection in Stripe
- Under Step 1 — Generate secure key, select Connect with Stripe. Stripe opens in a new tab.
- Sign in to Stripe and choose the Stripe account to connect, if you have more than one.
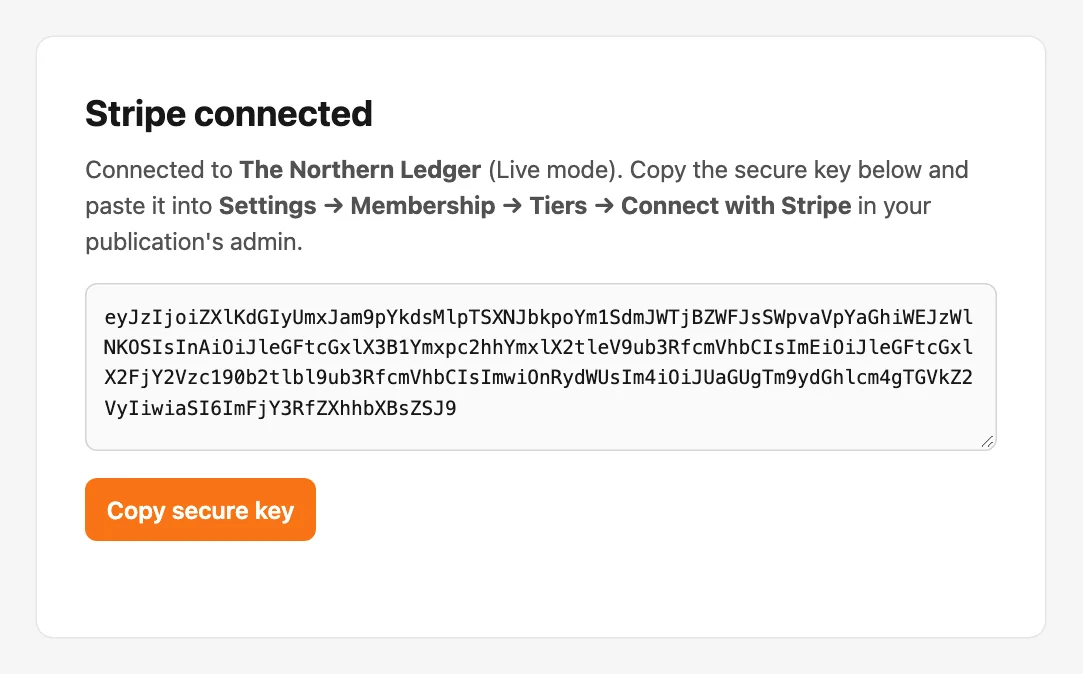
- Approve the connection. Stripe sends you back to a Blogaly page titled Stripe connected.
- Select Copy secure key.
4. Paste the key and save
- Go back to the tab with your admin. The Connect with Stripe window is still open.
- Paste the key into the box under Step 2 — Paste secure key.
- Select Save Stripe settings.
After a moment the window says You are connected with Stripe! with your Stripe account’s name (and (Test mode) if you chose it). Close it. The button on Tiers now reads Connected to Stripe with a green dot.
What changes once you’re connected
- Your first paid tier gets a starting price of $5 a month and $50 a year, and the sign-up pop-up starts offering free, monthly and yearly options. Change the name and prices straight away in Tiers and prices.
- Offers appear under Settings → Growth, and Gift subscriptions and Tips & donations under Membership.
- We add a webhook to your Stripe account, pointing at
your-name.blogaly.uk/members/webhooks/stripe/. It tells your site when someone subscribes, renews, changes plan or cancels. Don’t delete it in Stripe. If it goes missing, it’s set up again automatically. - Readers can now choose a paid tier in your site’s sign-up pop-up and pay on Stripe’s secure checkout page.
Switch from test mode to live
Test and live are separate connections. To go live, open Connected to Stripe, select Disconnect, then connect again with Test mode off.
Common mistakes
| What happened | What to do |
|---|---|
| Invalid secure key after pasting | The key was copied partly, or it came from an older attempt. Each time you select Connect with Stripe, the previous key stops working. Start again from step 3 and paste the newest key. |
| The key is rejected though it’s new | You approved in a different browser or after signing out of your admin. Do the whole process in one browser, without signing out. |
| Upgrade your plan appears | Your site is on Starter. Move to Publisher or Business in your dashboard, under Manage billing. |
| Payments work in test mode but not for readers | You’re still connected in test mode. Reconnect with Test mode off. |
| Stripe says your account isn’t activated | Finish Stripe’s activation steps in your Stripe dashboard. Until then, live payments are refused. |
Good to know
- One Stripe account per site. To use a different account, disconnect and connect the other one (with no active subscriptions in between).
- Readers pay by card by default. You can offer more methods; see payment methods.
- Set your statement descriptor, branding and receipt emails in your Stripe dashboard under Settings. Readers see them on their bank statement and receipts.
- Refunds and disputes are handled in your Stripe dashboard.
- Your Stripe connection is part of your site’s settings, not your Blogaly account. Each site connects separately.
Last checked against the product on 7 November 2026.
Related
Still stuck?
Tell us what you were trying to do and what you saw, and we’ll help you sort it out.
Contact us